User Guide – DiskZilla
- February 4, 2017
- DiskZilla
Congratulations on taking a step towards optimizing your Mac with DiskZilla.
We’ve bundled 8 of our best award winning applications to help you optimize and clean your Mac.
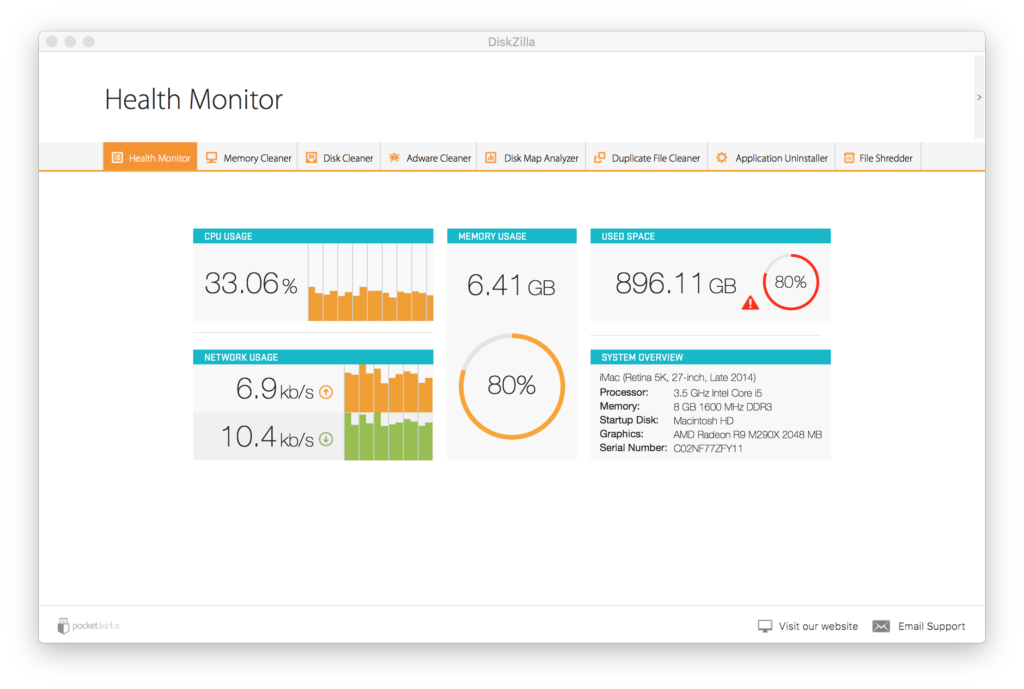
Health Monitor
Here you will see a convenient dashboard of your Mac’s analytics. Used space will be flagged red when DiskZilla detects you are using a significant amount of disk space and is recommending you to use “Disk Cleaner”.
Memory Cleaner
Memory cleaner breaks down your system memory into a more granular view. You will see the exact usage by memory type. (e.g Wired, Compressed, File Cache, App Memory). You will also see which apps are using significant memory.
Click “Optimize” to free up space. You will immediately see the results.
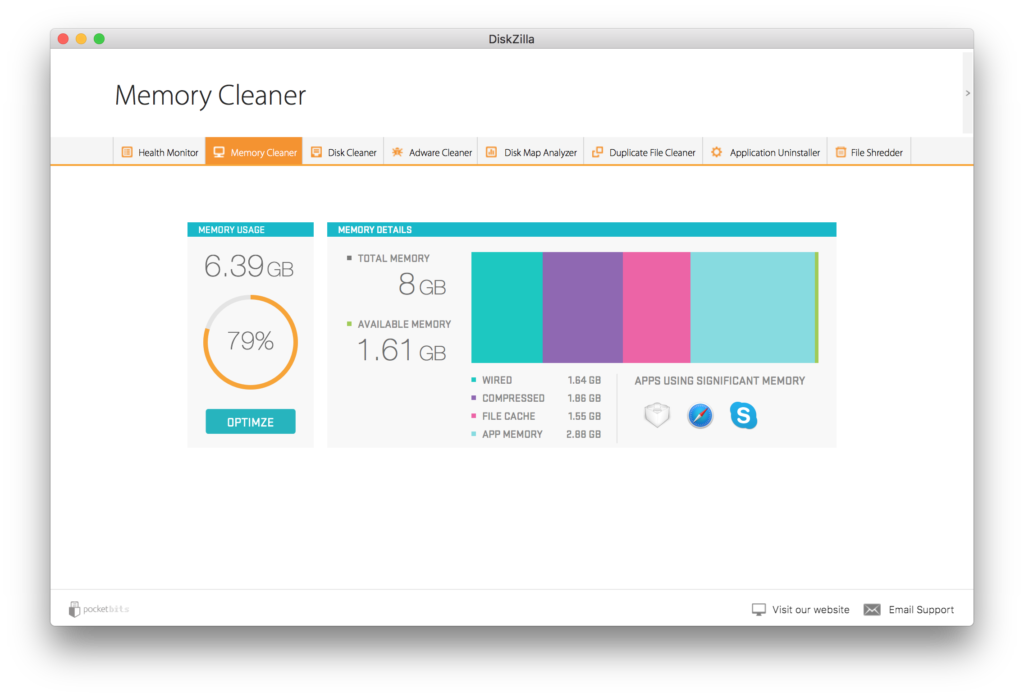
*Tip: Memory cleaner is most efficient when used after closing a memory intensive application you don’t plan on using for a while.
Disk Cleaner
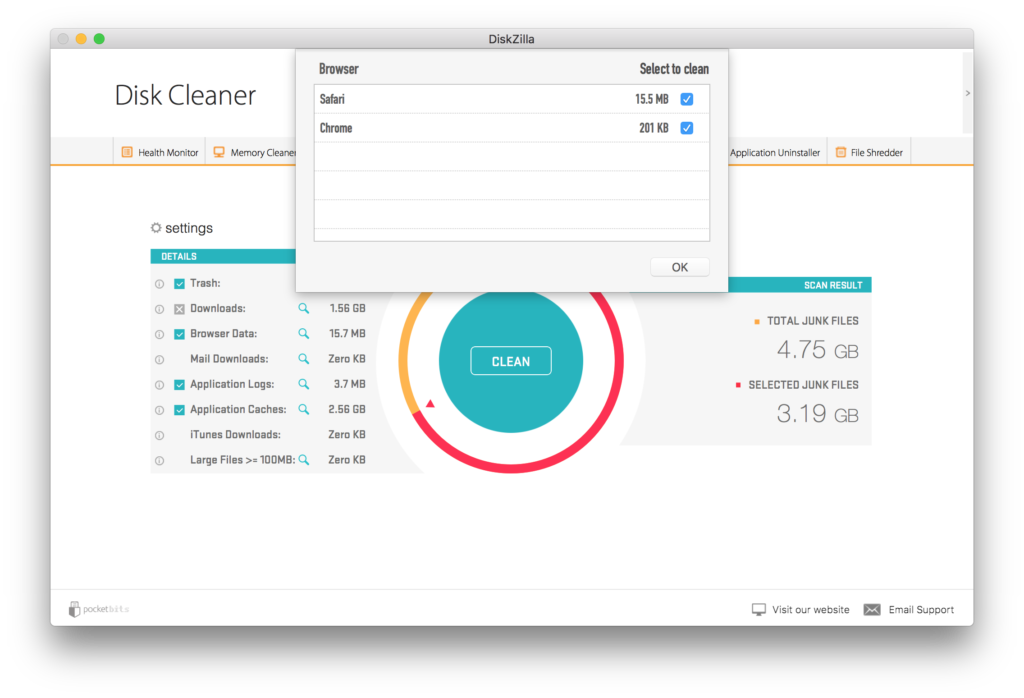
Disk cleaner will first show you your free disk space, used disk space, and total disk space.
Press “Scan” to have the Disk Cleaner algorithm discover what needs to be cleaned.

By default you will notice that the “safe” items are pre-selected for cleaning. This includes Trash, Browser Data, Application Logs, and Application Caches. Possibly more depending on what Disk Cleaner discovers.

Downloads and Large Files will never be automatically selected. You may have important files under your documents folder, so please use caution and check these files to make sure you want to delete them before cleaning. Clicking the “i” info button will give you a detailed description of what each category is that is marked for deletion.
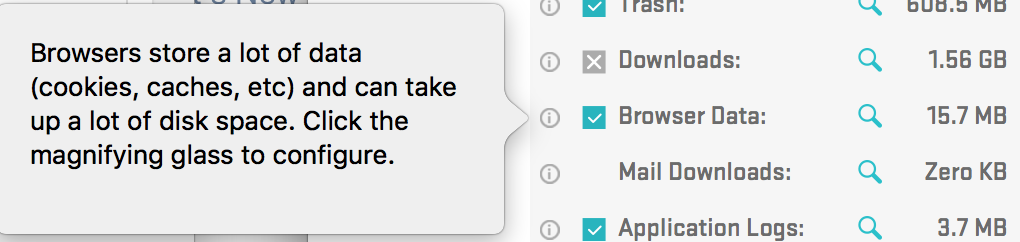
The magnifying glass icon on the right side will show you additional options or take you to the actual folder that the “Downloads” or “Application Logs” are located.
(below example shows your options for “Browser Data”)
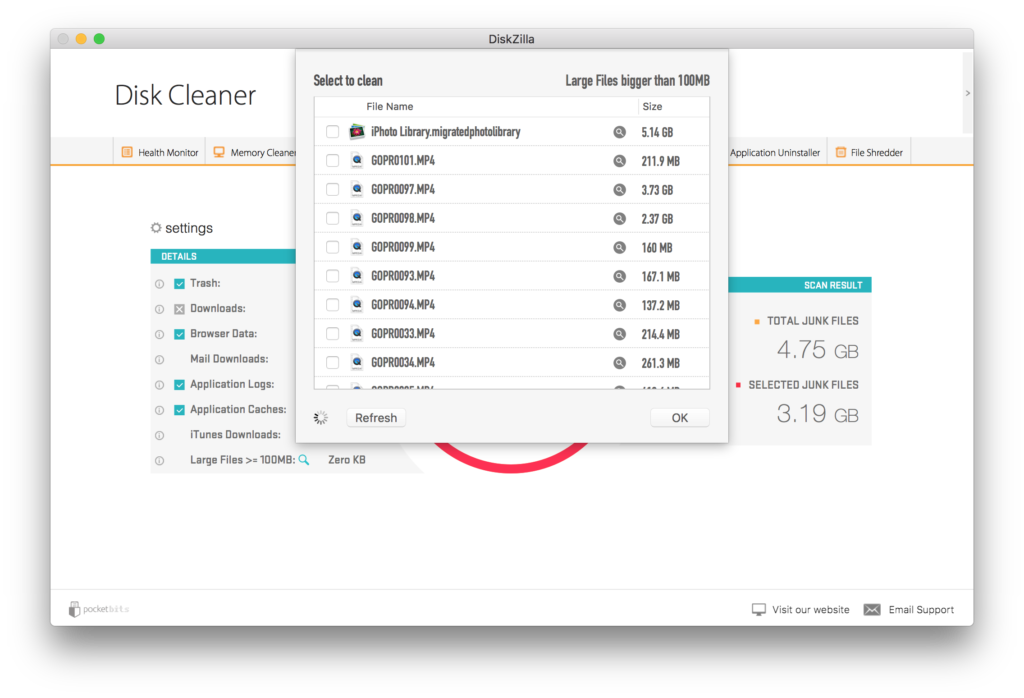
Clicking the magnifying glass for “Large Files > 100MB” will show you an organized list of all files on your Mac that are bigger than 100MB. Here you can identify and select the largest files that you might have forgotten about. You can go to the location of these files by clicking the magnifying glass next to them.
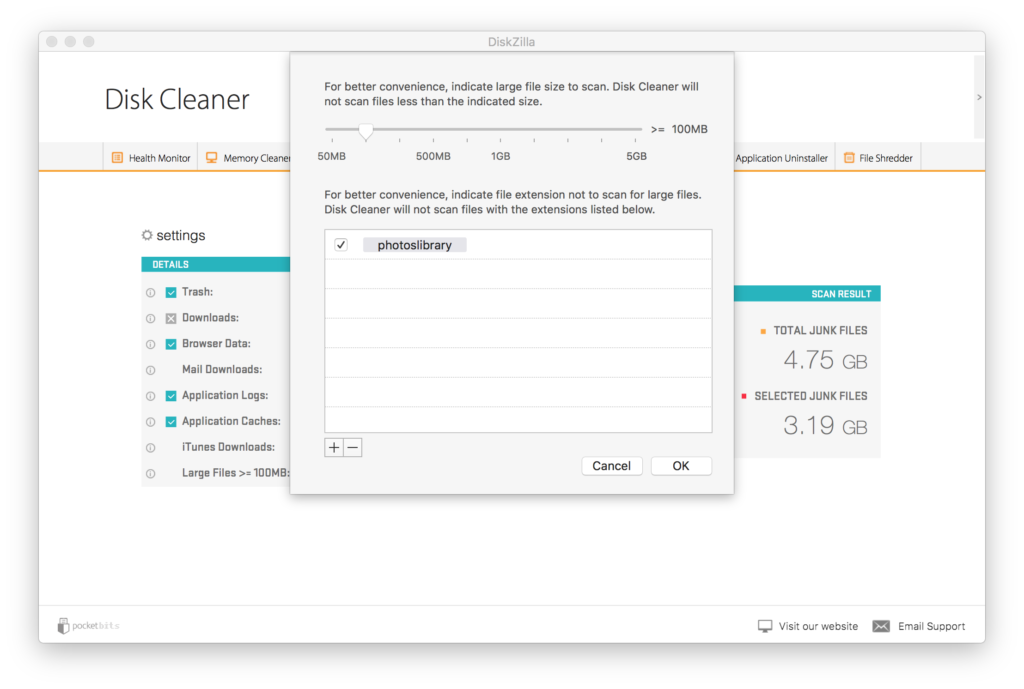
Click the “settings” icon to view the rules for scanning for “Large Files”. Here you can filter the search to exclude anything by file extension. You may also adjust the size for the files you are scanning for. (e.g. If you only want to scan for large files greater than 500MB)
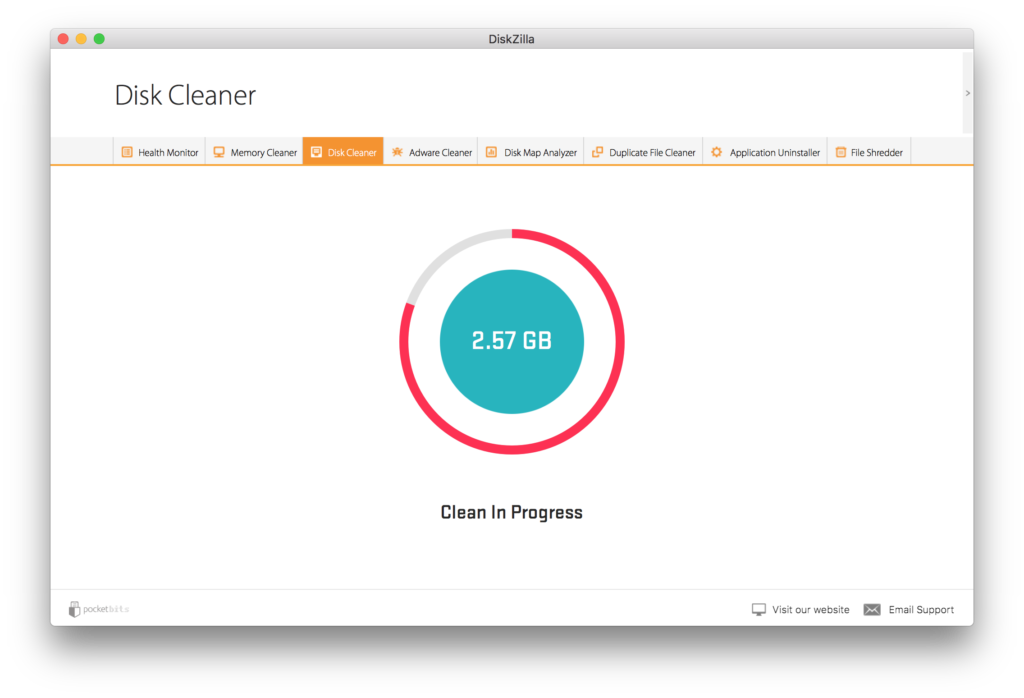
Finally click “Clean” when you are ready to clean the selected items on your Mac.
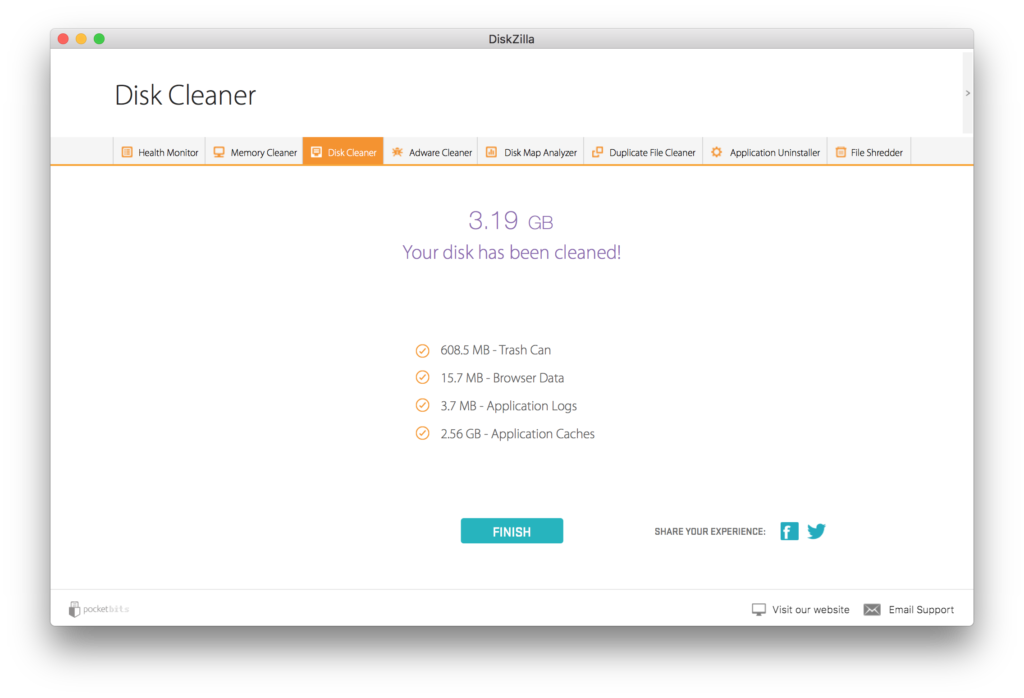
Congratulations. You’ve finished cleaning your disk!
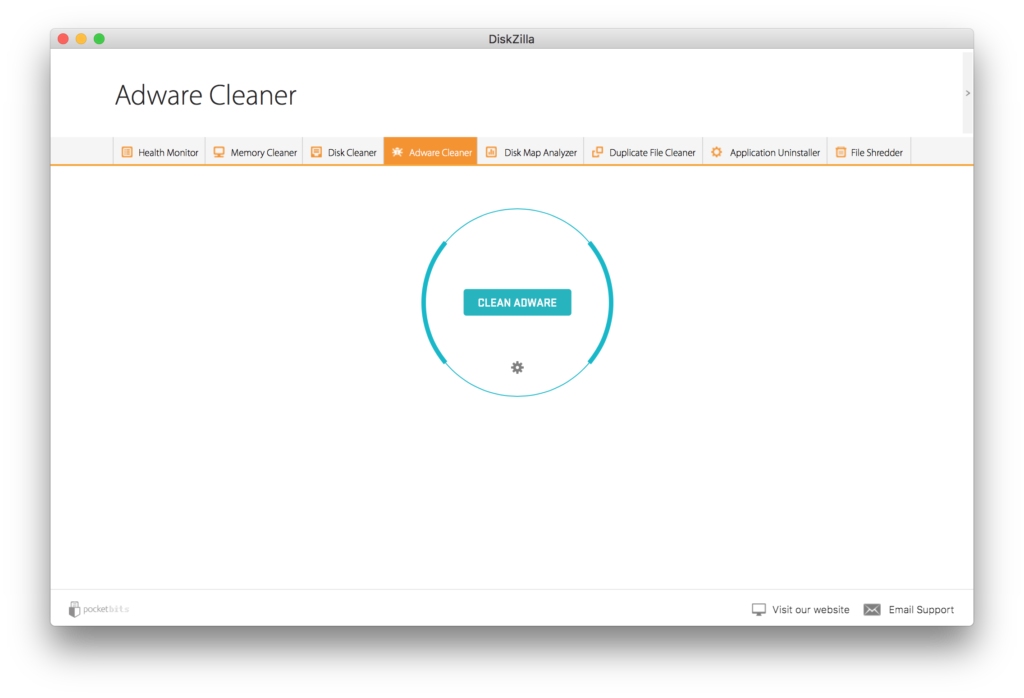
Adware Cleaner
Click the settings icon in the center to choose which browser extensions to also clean. This is required as a lot of harmful adware will tend to hide in disguise as browser extensions. This will not reset your bookmarks and history. You can reinstall your favorite trusted browser extensions again after the clean is complete.
If you still experience Adware symptoms, please check the support options on the right side. We have documentation, tips, and also a convenient email button to contact support. You will be answered within 24 hours.
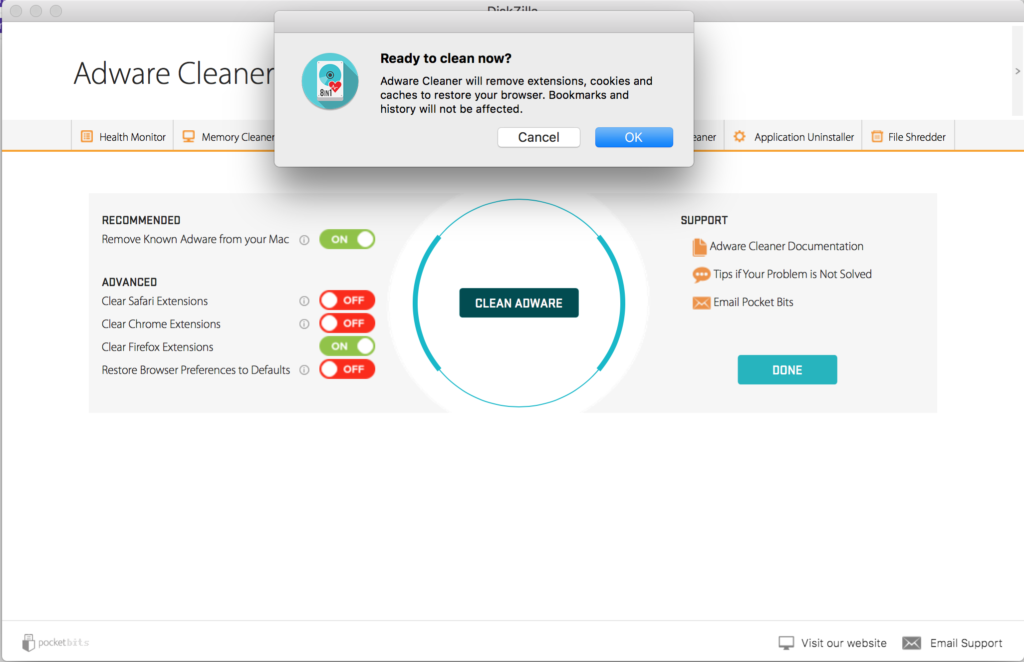
Congratulations! You’re adware has now been cleaned. Please also check out tips on how to prevent more adware in the future.
Disk Map Analyzer
Drag and drop your folder or disk to map your drive.
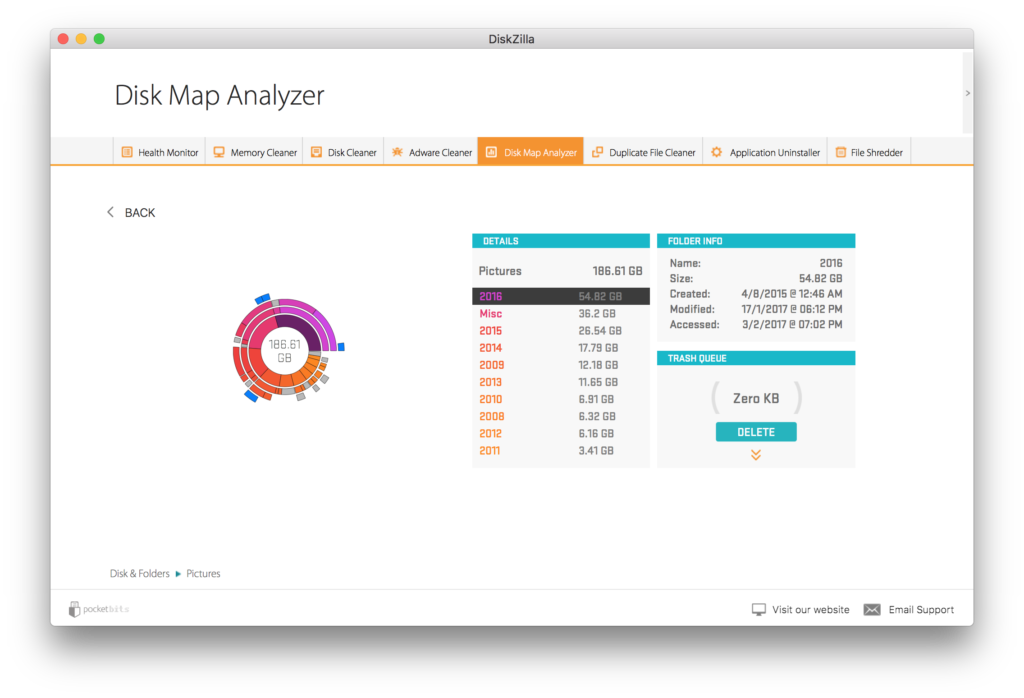
At the highest tier (centermost) you will see the different folders/files. As you move to the outermost layers, you will be traversing down to the lowest tier. Click the very center to navigate back up to the highest tier.
You can hover your mouse over the sunburst map to reveal the file/folder information on the right side. You can also navigate over the file/folder on the right side and you will see that part of the sunburst map highlighted on the left sunburst map. Clicking any part of the sunburst will navigate to that file or folder. Our goal was to create a beautiful and intuitive interface that felt familiar.
The right side toolbar will feel very familiar because it mimics the utility of your native OSX Finder. Just like Finder, you can select a file and preview it by pressing “spacebar”. You can also right click any file/folder to reveal it in Finder. You’ll also notice the top of the window shows the file-path that you are currently in, which you can click around to navigate.
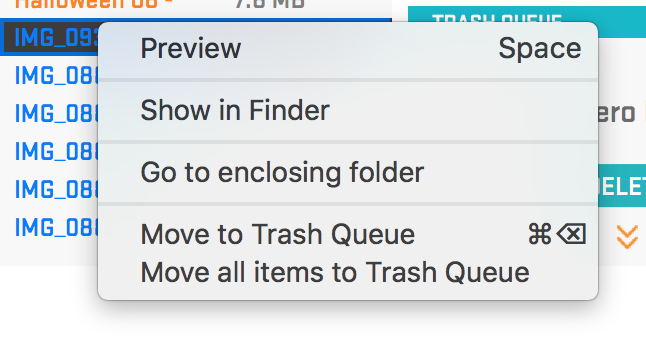
Anything is selectable to move to the trash queue. You can either right click and select “Move to Trash Queue” or you can drag & drop it to the trash queue below.
You’ll see the “Trash Queue” with the blinking animation when you drag & drop a file over the correct area.
The trash queue will then populate and update the size of the total files in the trash queue.
Clicking the down arrow in the trash queue will expand it’s contents to see every file/folder that has been added.
Once you have added all the files/folders for deletion, click “Delete” from the trash queue.
Congratulations, you have just successfully learned more about your hard disk. Not only have you navigated it flawlessly, you have found files to clean up your disk.
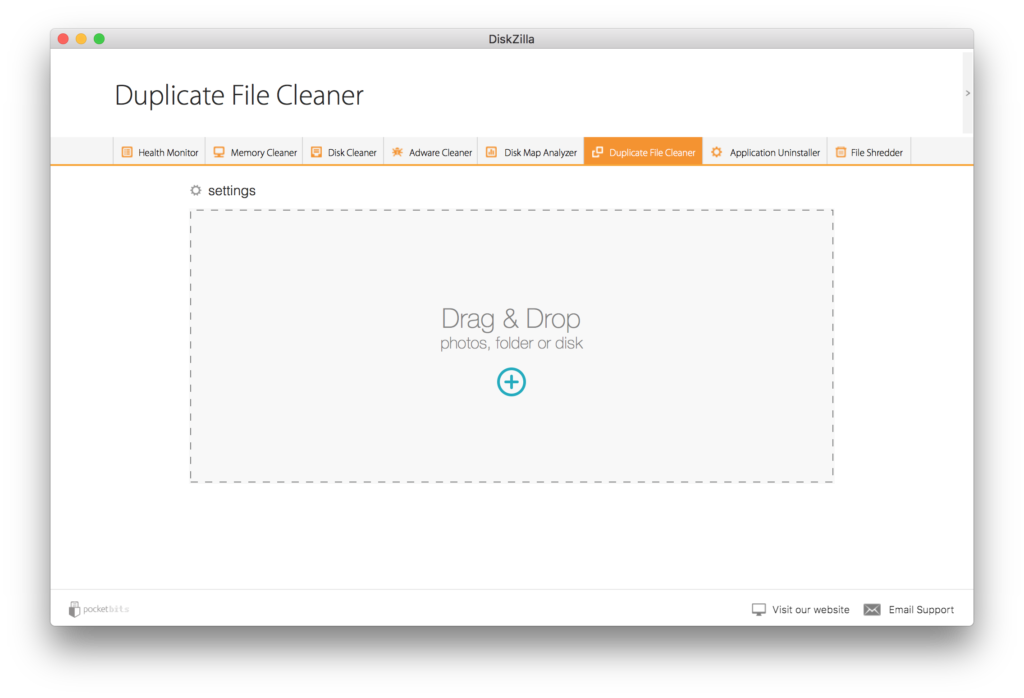
Duplicate File Finder
Duplicate File Cleaner uses a true SHA-1 checksum file compare to ACCURATELY find legitimate duplicates. This means that it finds all duplicate files by looking at the actual HASH value. So if the contents of the file are changed in anyway, then it is no longer a legitimate duplicate since the hash values are different. Renaming a file does not change the file contents, so Duplicate File Cleaner will still find all duplicates even if they are named differently.
Getting started is easy and painless. Just drag & drop any folder to find all your duplicates.
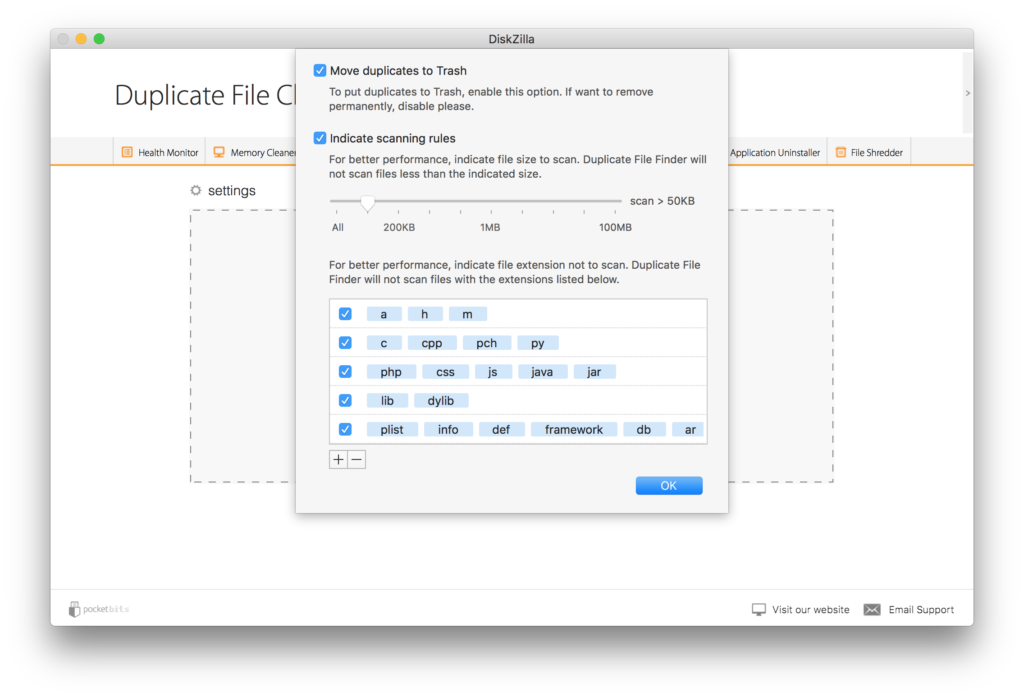
You can also set the scanning “rules” by clicking the settings icon on the top left. For example you might only care about duplicates that are larger than 10MB and want to exclude all mp3 duplicates.
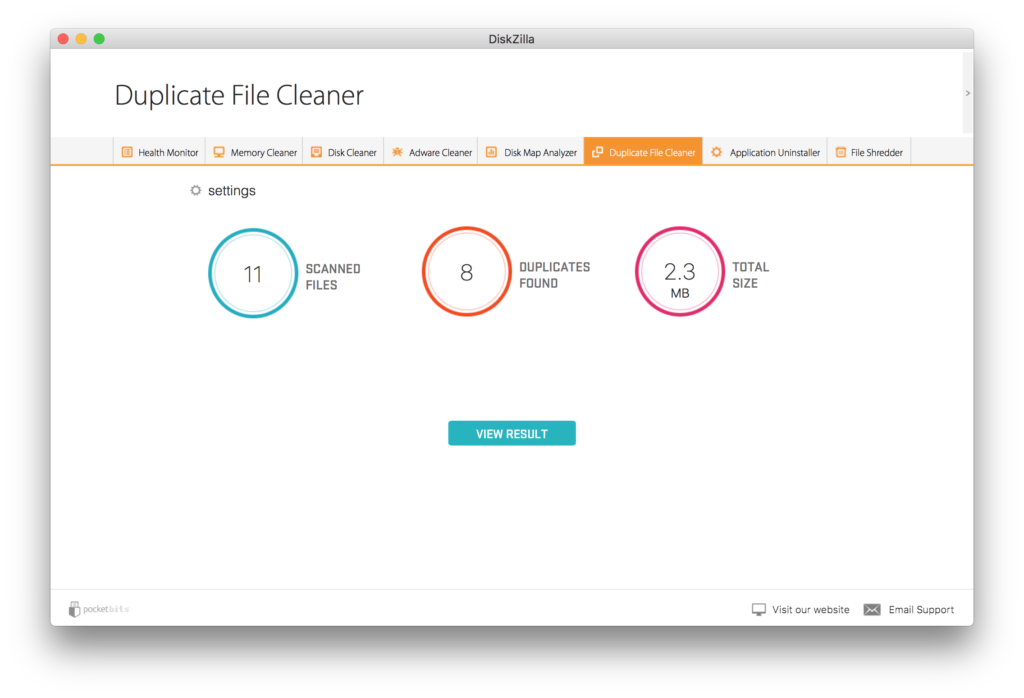
Once scanned, you will see your results.
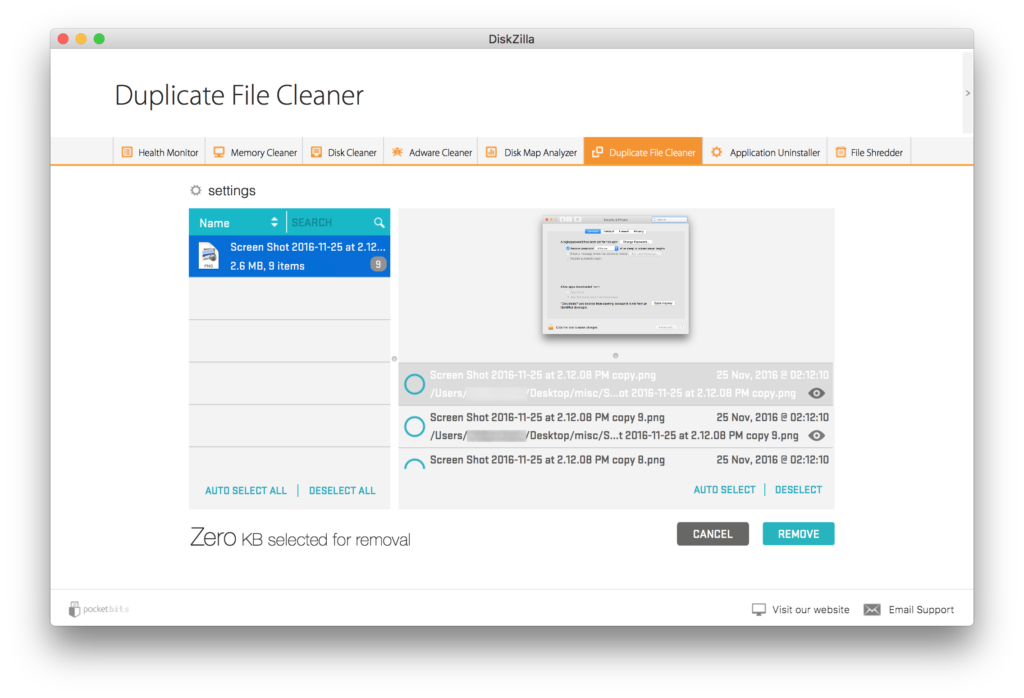
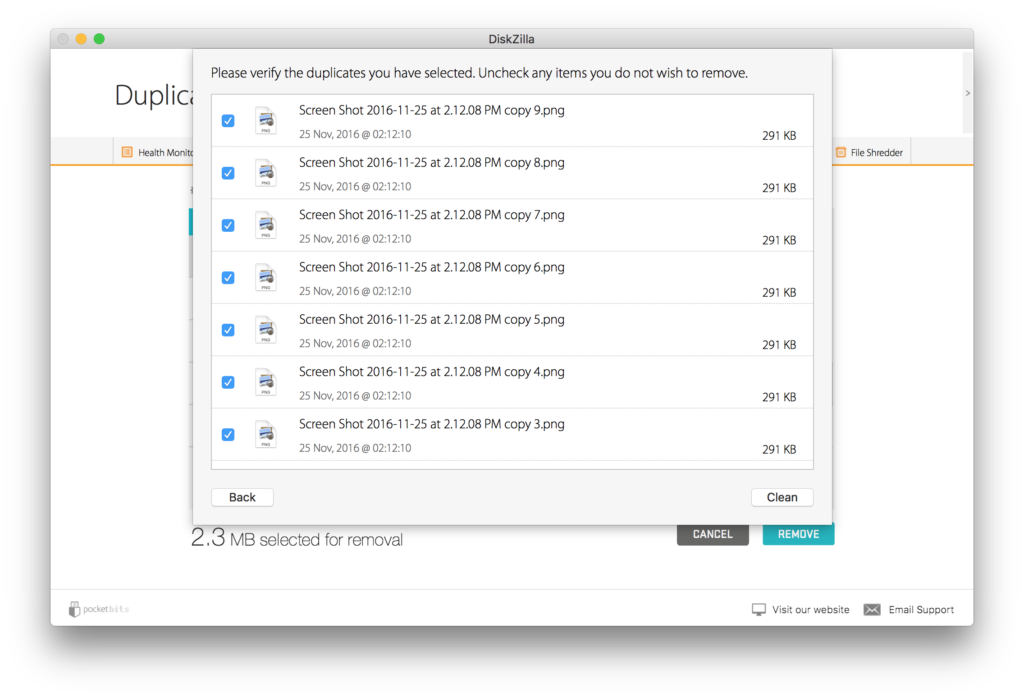
You will have the option to sort your duplicates by file name, size, path, or even use the search box to search by typing in the name. The duplicate files and the total number of that file will be shown on the left.
In our example there are a total of 9 files that are the same. 8 are selected for removal as they are all duplicates and we want to keep the 1 original. We’ve clicked the “auto select all” to conveniently mark all the duplicates automatically and save the original version. The preview window on the right is convenient to show a preview of the selected file. Clicking the “eye” icon will open up the file in Finder.
Click “Remove” and confirm on the next screen when ready to remove.
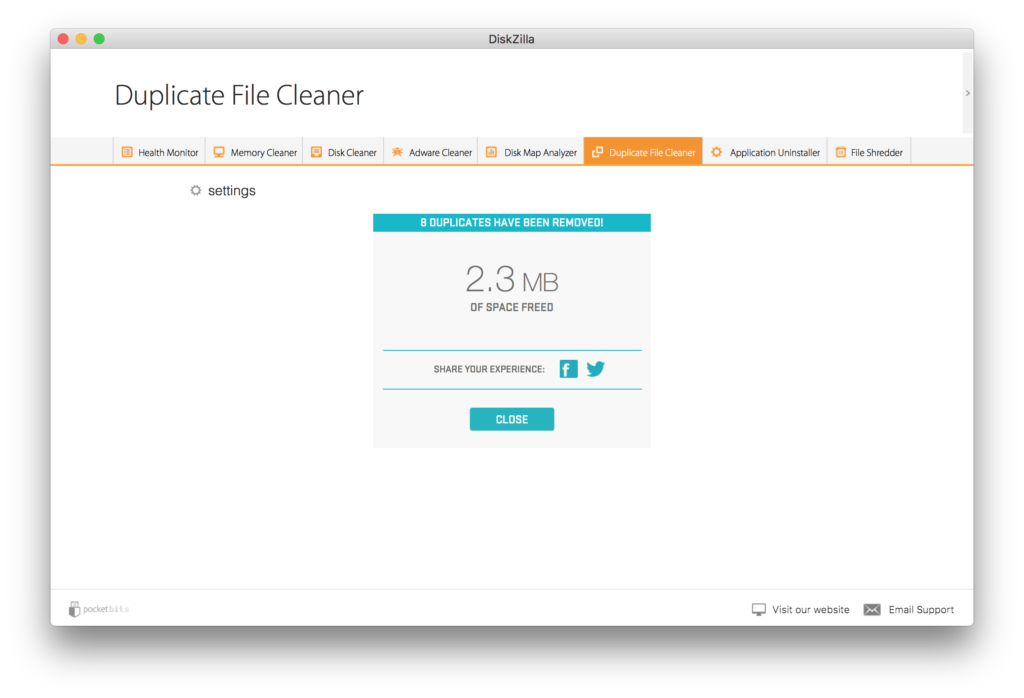
Congrats! You’ve cleaned up even more space by removing your duplicates! 🙂
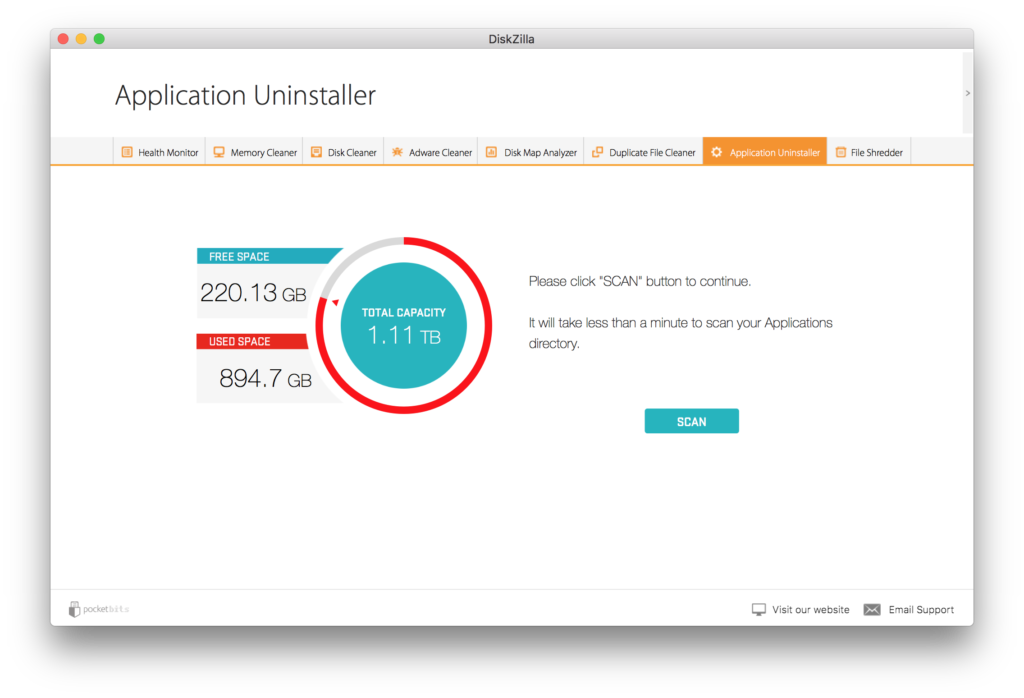
Application Uninstaller
When applications are installed, there are a lot of moving parts in various directories. These files include application logs, application caches, random plist files, and all sorts of other junk that are left on your Mac when all you do is drag and drop the application icon into the trash. Not everything is removed and all this junk adds up and eats up valuable disk space. DiskZilla’s Application Uninstaller intelligently locates your applications so you can properly uninstall these apps with everything associated with them. This includes all that junk that you no longer need.
Press “Scan” to get started.
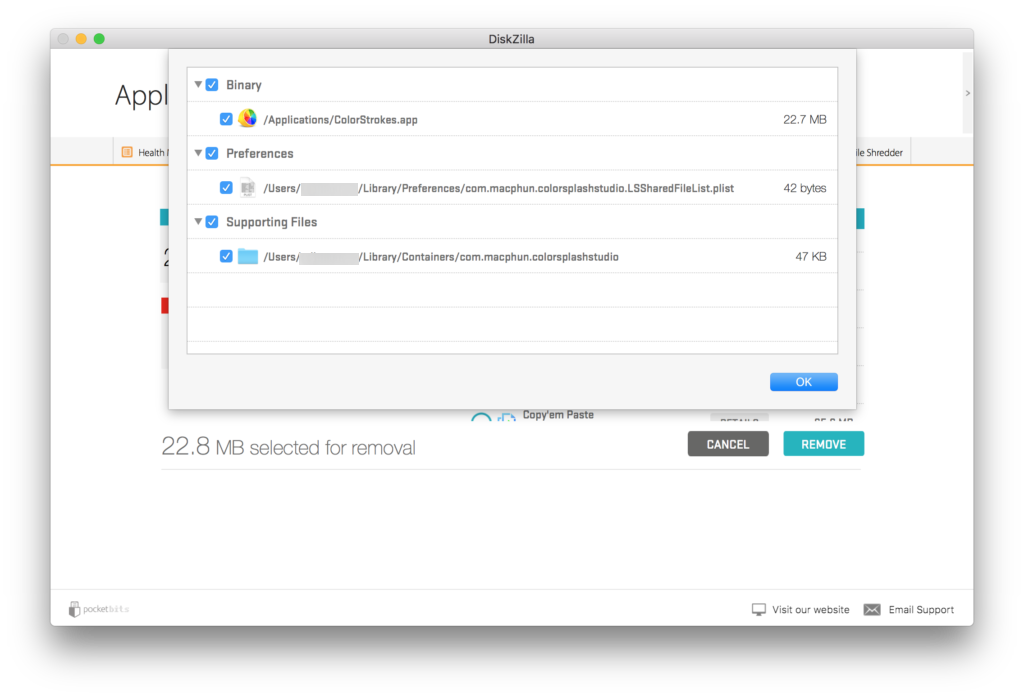
After scanning is completed, you will see a list of apps on the right side. Clicking details will show you all the “junk” or application logs, application caches, and/or anything else related to that app that is hiding on other locations of your hard drive.
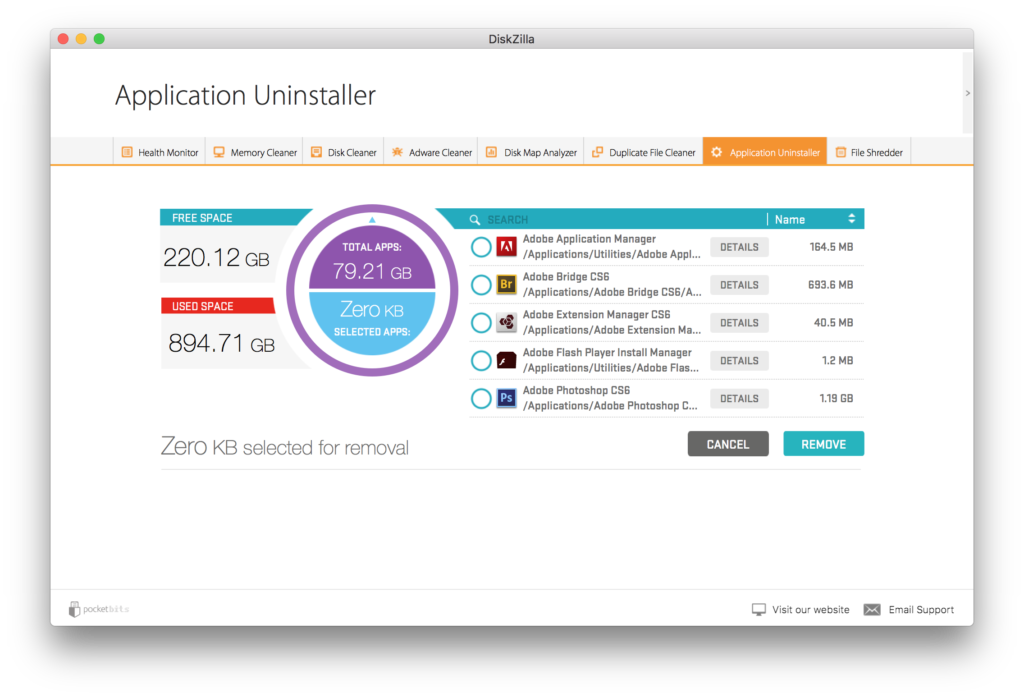
*Please note that core Apple products cannot be removed due to Apple’s sandboxing restrictions.
Click “Remove” when ready and then you will be taken to the confirmation screen. When you click “Proceed”, you will notice action items in red that require you attention.
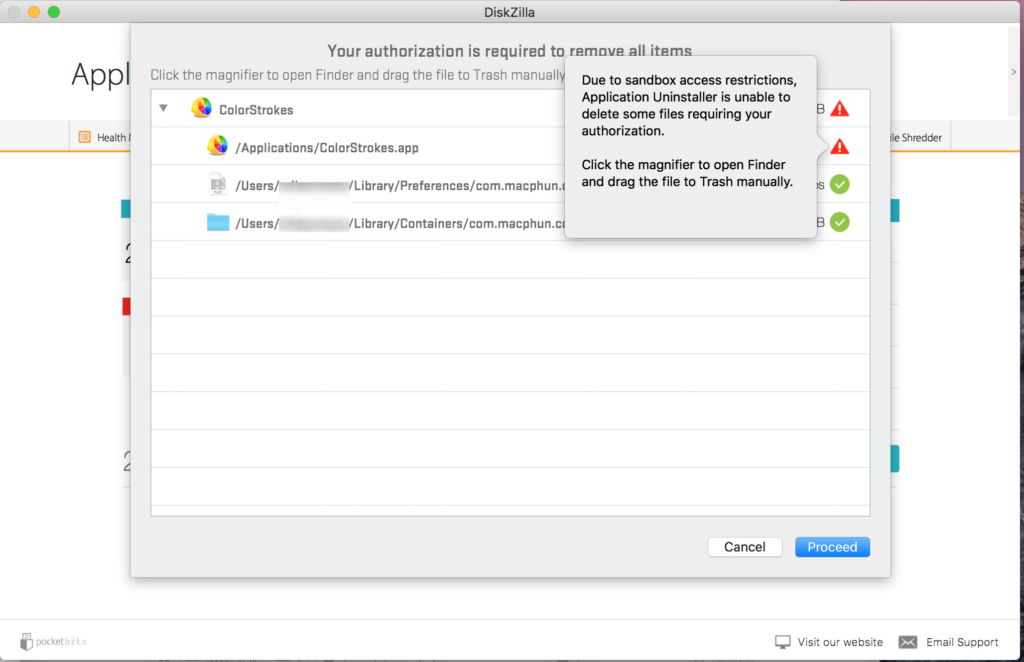
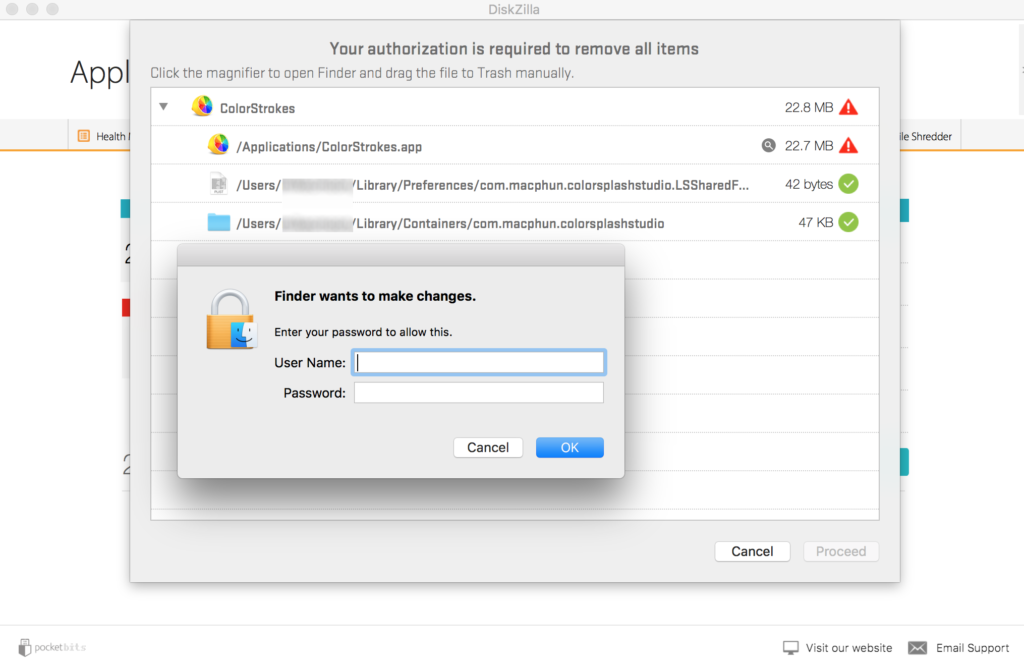
Due to Apple’s sandbox restrictions, you will need to press “Proceed” again and then enter your admin/user password to give your Mac permission to delete these files. Unfortunately Apple only allows apps to be removed in this way. There is no way around this.
Congratulations, you have now successfully properly uninstalled your selected apps along with all of their junk files.
File Shredder
Drag and drop files to securely delete them. They will be permanently deleted and unrecoverable.
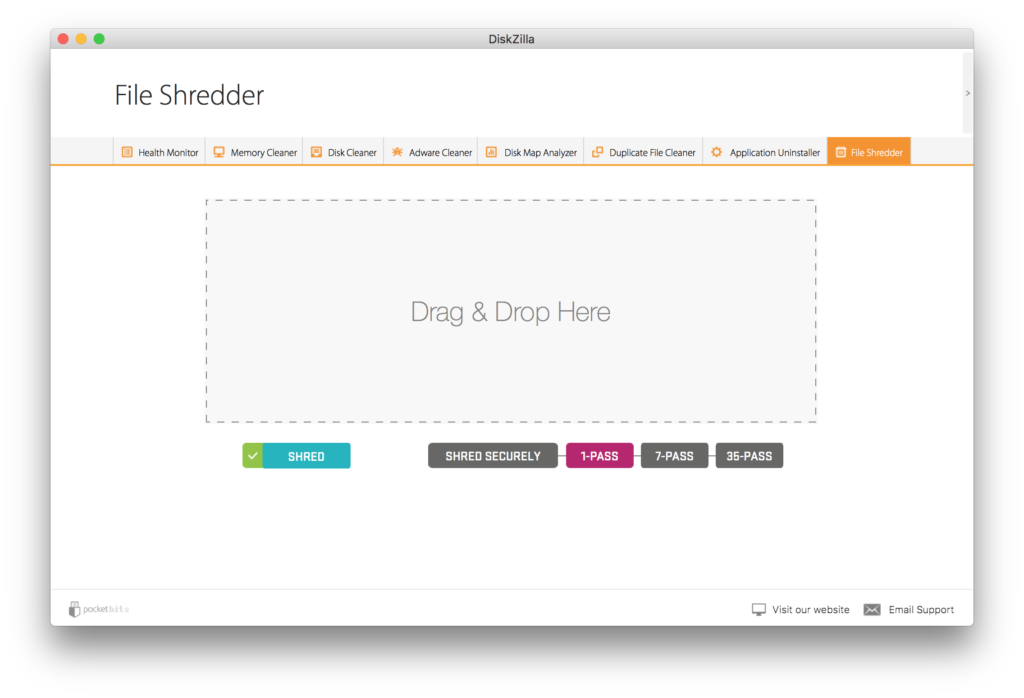
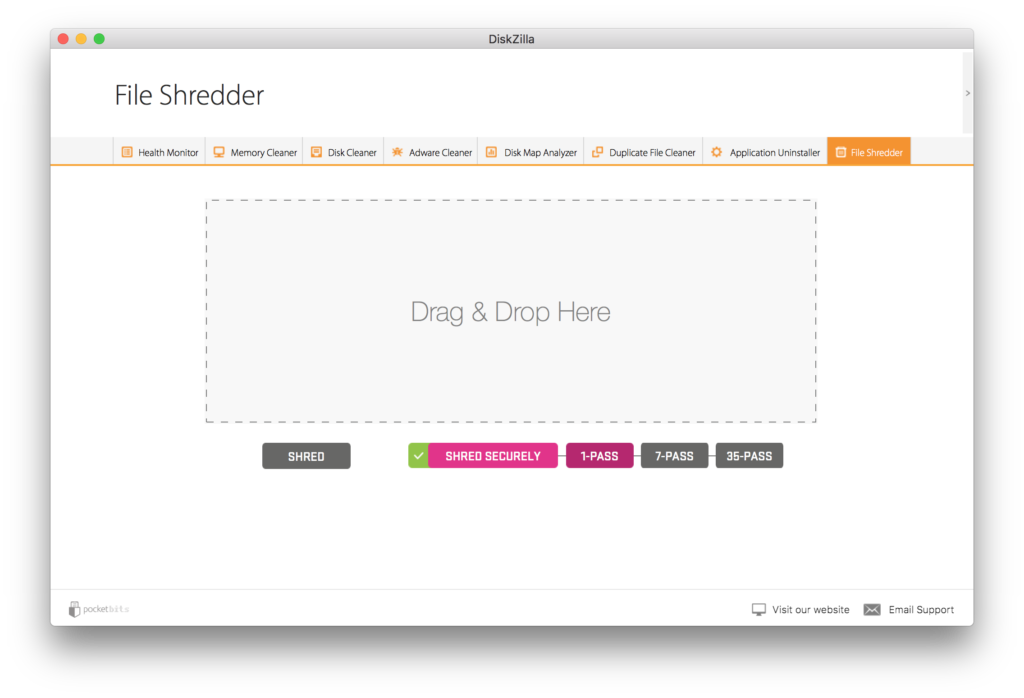
DiskZilla gives you 3 levels of secure deletion and 1 option for standard/normal deletion (not secure).
◎ Quickly and SECURELY overwrite your threats with 1-pass
◎ Overwrite your threats with United States Department of Defense Method (DoD 5220.22-M) 7-pass government standard
◎ File recovery won’t be an option with the MOST SECURE 35-pass Gutmann method
What is a pass and what’s the difference between 1-pass, 7-pass, and 35-pass?
It’s the number of passes you overwrite your data. In theory, overwriting it once should do the trick to make the data unrecoverable. 7-passes of overwriting data will ensure more security, but take a little longer. 35-passes would be the most secure of all.